.....just a journal of mostly photos of my gardening adventures... minus the backlog of over 1000 photos not yet uploaded! Also, I find myself collecting some recipes and just good ideas so this is the perfect place to put them. More pictures are on Pinterest at pinterest.com/laurelWisconsin.
Tuesday, July 30, 2013
Monday, July 22, 2013
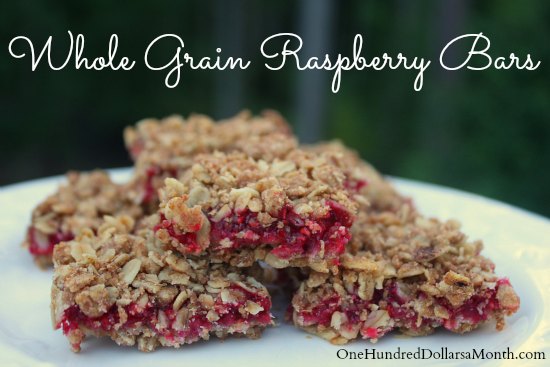
Whole Grain Raspberry Bars
Thanks Mavis!
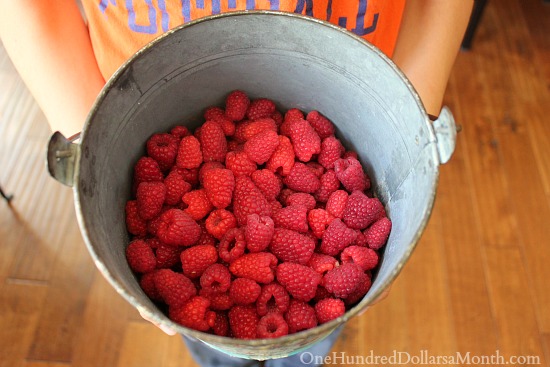
Holy raspberry season Batman! I am swimming in them and looking for raspberry recipes to try. This one looked like a perfect treat for breakfast and it did not disappoint. Plus it’s on the healthier side, which makes me feel like Mom of the Year when I feed it to my kids.
Ingredients
1 1/2 cups old-fashioned or quick-cooking oats {I used old fashioned}
3/4 cup whole wheat flour (oat flour)
1/2 cup packed brown sugar
1/4 cup wheat germ (flax seed)
1 teaspoon ground cinnamon
1/3 cup vegetable oil (olive oil)
1 egg (egg beaters)
Raspberry Filling
1 pint raspberries
1/4 cup sugar (stevia)
2 tablespoons cornstarch
2 tablespoons lemon juice
Directions
Preheat oven to 350 degrees.
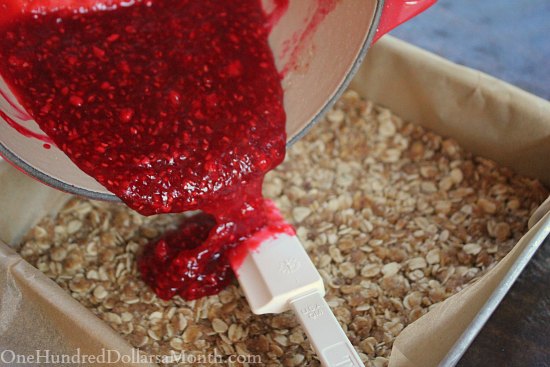
Combine raspberries, sugar, cornstarch and lemon juice in a saucepan. Cook over medium heat until mixture comes to a boil, stirring constantly. Simmer 2 minutes while continuing to stir constantly until sauce is thick and translucent. Remove from heat and set aside.
Combine oats, flour, sugar, wheat germ and cinnamon in a food processor. Process until oats are finely ground { I totally forgot to grind mine and the bars still turned out great!}. Add oil and egg, and pulse until combined. Press half of the crumb mixture evenly on bottom of a 9×9 baking pan/dish. Pour raspberry filling over crumbs, spreading evenly. Top with remaining crumbs and gently pat mixture down. Bake for 25 minutes or until golden brown. Let bars cool completely before cutting into bars.
Saturday, October 13, 2012
Homemade Stevia Syrup
Posted by Jaime W. in Chemical-Free Living, Living on pennies, Recipes
August 30, 2012
So, I had this brilliant idea while walking around a plant nursery early this spring. On a shelf near the herb section, I saw a little stevia plant. Stevia! I can grow my own stevia! It’s natural! It’s fairly easy to grow! It’s not horribly fatsy like sugar! I’ll never have to buy sweetener again!
Here’s my (somewhat overgrown) stevia plant, next to my cute little basil plant.
Proud of my genius, I made the investment—I bought the plant. I’d love it. I’d nurture it. I’d have it forever, and I’d never ever ever have to buy stevia in any form again. It was going to be awesome.
It wasn’t until a few weeks later, when the plant started to grow so large that it was flopping over the edges of the pot, that I suddenly realized—wait, what do I do with this, exactly? I asked around a bit, and got the same exact enthusiastic answer from five different trusted gardeners. “Throw a few leaves in with your iced tea!” Okay, yes, that’s great—but seriously, how much iced tea can a person drink? Besides, that eliminated my need for sugar in exactly one recipe—not even a recipe I made very often!
I finally decided to trim and dry a few of the leaves. I’d done it a few years before with my excess fresh basil, and it was simple enough. I’d just use what I could fresh, and dry the rest! Problem solved, right? Except what in the world do I do with dried stevia leaves? More tea??? No. I need something more flexible. I need something that I can add to recipes without it looking like I’ve poured Italian seasoning in my dessert. I had to find a way to make my stevia more versatile.
Get ready for this: Stevia Syrup! Perfect for adding to tea, coffee, lemonade, smoothies, fruit crisps and cobblers, pie fillings, homemade yogurts and kefirs, your morning oatmeal—if it won’t miss the added bulk of sugar (some recipes do need that 1 cup of sugar, because it fills out the recipe), stevia syrup will work. There are even recipes for baked goods that use only stevia (or mostly stevia) as the sweetener. It’s up to 200 times sweeter than sugar, so you only need a tiny bit—it won’t add too much liquid to your recipes.
I let my coarsely chopped stems and leaves soak (covered) for about 36 hours.
Here’s the recipe:
3 c. of distilled (purified) water
3 c. of chopped stevia leaves and stems (loosely packed)
Place the chopped leaves in a glass container and add 1 c. of the water. Cover tightly and let sit for 24 hours. Test for sweetness. If it isn’t sweet enough, give it another 12 to 24 hours. Strain it into a pan (ceramic is best),and bring to a simmer. Let simmer for 20 minutes; cool.
The longer it reduces, the more potent the sweetness.
Don’t get greedy with the sweetness. I was tempted to do it, too. “If letting it sit longer makes it sweeter, I’ll let it sit all week!” Not a good idea, evidently. Ever had something sweetened with stevia that had a funky, bitter aftertaste? It’s because someone got greedy. Don’t let it sit any longer than 48 hours—and less is more!
It’s a very earthy green color–but that just means more nutrients! Don’t worry, it won’t dye your food.
This needs to be refrigerated, and it will last at least a few weeks in the fridge. To keep the batches coming even when your lil’ stevia guy goes into slow winter growth mode, dry leaves when you have an abundance, and use the dried leaves to make fresh batches of syrup. The strength probably won’t be identical, so check it a few times during steeping.
I put about a spoonful in my plain yogurt (see the green?), and it was just the right amount of sweetness.
Stevia powder is another option—and it’s a bit simpler, too. Just dry the leaves and then grind them with a mortar and pestle, or a coffee grinder if you have one. The powder will work just like the syrup does—provided you don’t mind the green color and the texture of the powder in your food and drink (which I do, hence the syrup).
I hope you try it, and here’s to healthier eating habits!
Friday, September 28, 2012
How to Make Homemade Yeast
What’s surprising is that yeast occurs naturally on the skins most fruits (dried or fresh), vegetables, even herbs found in the wild (like Mint) and can be easily cultivated the same way using the following procedure:

Step 1: Fill a glass jar up to a quarter to a half full with your sliced fruit, vegetable, or herb (I used apples from my apple tree). If you are using fruits (apples or grapes are both excellent to try first) or vegetables be sure that the skin is not peeled off.

Step 2: Fill the rest of the jar up with water until you are about 3/4 of the way full.

Step 3: Close the jar and leave in a warm area (in the sun or by a stove) for around 3 days or until a good amount of bubbles start forming (the bubbles indicate that the yeast is reacting with the carbohydrates in your fruit, veggie etc).

Here’s a close-up view of the finished yeast water.

Step 4: Use your yeast water in place of the water called for in your bread recipe.

Step 5: Knead your bread as usual and let it sit…

Step 6: Until it rises — just like you were using commercial yeast!
Step 7: Bake and enjoy!

Thursday, September 27, 2012
Green Tomato Cake
OK… I think the decision has been made… bring the green tomatoes into the house and make cakes and freeze them! The recipe is for the second picture but – oh my – check it out with cream cheese icing!! YUM…
Ingredients:
- 2c. white sugar
- 1c. brown sugar
- 1 cup vegetable oil (or 1 c, pumpkin)
- 3 eggs (3/4 c. egg substitute)
- 2 teaspoons vanilla
- 3c. flour
- 1c. whole oats coarsely ground
- 1 teaspoon salt
- 2 teaspoon baking powder
- 1 tsp. cinnamon
- 1 tsp. nutmeg or allspice
- 1 cup pecans or walnuts
- 1 cup raisins or craisins
- 3c. pureed green tomatoes

Preparation:
- Preheat oven to 350°.
- In mixing bowl, beat sugars, vegetable oil, eggs and vanilla until smooth and creamy.
- Sift together the flour, oats, salt, baking powder, cinnamon and nutmeg.
- Slowly beat into egg mixture. Blend well.
- Stir in walnuts, raisins and tomatoes.
- Pour into greased 9x13-inch pan.
- Top with coconut if desired.
- Bake for one hour, or until a wooden pick or cake tester inserted in center comes out clean.
- Serves 12.
Wednesday, September 5, 2012
Salsa!
Well I should have taken a picture it was so pretty!
Tomatoes: red, yellow, darker red (so good)
Cherry tomatoes: red, yellow
Tomatillos: purple, verde
Not shown… red and green peppers and peaches
Chopped ‘em all up and added some already made salsa for flavoring and it was yummy!


