
Tuesday, July 30, 2013
Friday, July 26, 2013
Lesson’s learned…
Start sooner…. This straw bale gardening is going to work.. it’s a wonder these plants are even alive!


What’s below was unplanned. There were yet more tomato plants without homes so I thought “why not”….
The plan is to cover this area to extend the season and for next year to start it earlier. we’ll see!

Tuesday, July 23, 2013


Monday, July 22, 2013
Whole Grain Raspberry Bars
Thanks Mavis!
Holy raspberry season Batman! I am swimming in them and looking for raspberry recipes to try. This one looked like a perfect treat for breakfast and it did not disappoint. Plus it’s on the healthier side, which makes me feel like Mom of the Year when I feed it to my kids.
Ingredients
1 1/2 cups old-fashioned or quick-cooking oats {I used old fashioned}
3/4 cup whole wheat flour (oat flour)
1/2 cup packed brown sugar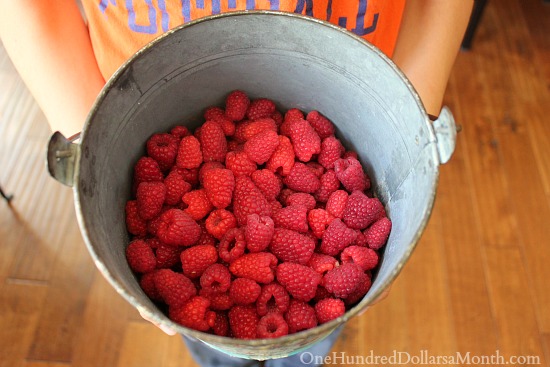
1/4 cup wheat germ (flax seed)
1 teaspoon ground cinnamon
1/3 cup vegetable oil (olive oil)
1 egg (egg beaters)
Raspberry Filling
1 pint raspberries
1/4 cup sugar (stevia)
2 tablespoons cornstarch
2 tablespoons lemon juice
Directions
Preheat oven to 350 degrees.
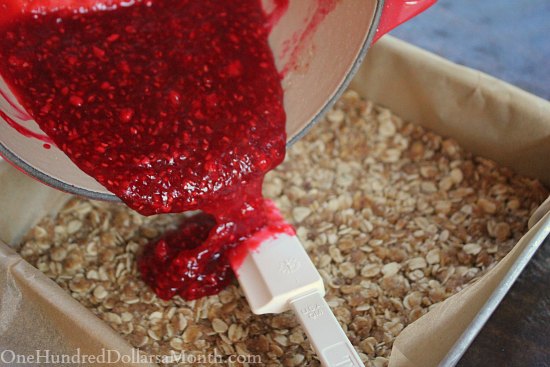
Combine raspberries, sugar, cornstarch and lemon juice in a saucepan. Cook over medium heat until mixture comes to a boil, stirring constantly. Simmer 2 minutes while continuing to stir constantly until sauce is thick and translucent. Remove from heat and set aside.
Combine oats, flour, sugar, wheat germ and cinnamon in a food processor. Process until oats are finely ground { I totally forgot to grind mine and the bars still turned out great!}. Add oil and egg, and pulse until combined. Press half of the crumb mixture evenly on bottom of a 9×9 baking pan/dish. Pour raspberry filling over crumbs, spreading evenly. Top with remaining crumbs and gently pat mixture down. Bake for 25 minutes or until golden brown. Let bars cool completely before cutting into bars.
Cucumbers!!


- Harvest regular slicing cucumbers when they about 6 to 8 inches long (slicing varieties).
- Harvest dills at 4 to 6 inches long and pickles at 2 inches long for pickles. The large cucumbers can be up to 10 inches long and some types are even larger.
- Cucumbers are best picked before they seeds become hard and are eaten when immature. Do not let them get yellow. A cucumber is of highest quality when it is uniformly green, firm and crisp.
- Any cucumbers left on the vine too long will also get tough skins and lower plant productivity.
- At peak harvesting time, you should be picking cucumbers every couple of days.
- Keep them picked. If you don’t, as plants mature, they will stop producing.
- Cucumbers are over 90 percent water. Store wrapped tightly in plastic wrap to retain moisture.
- They will keep for a week to 10 days when stored properly in the refrigerator.
Sunday, July 21, 2013


Saturday, July 13, 2013
The fire pit…
Now that it’s this far I want to change it and dig out the middle 
part and fill it with sand and gravel… AT least all the blocks are
there in the same place!

part and fill it with sand and gravel… AT least all the blocks are
there in the same place!
Ready for blueberry bushes….

Well …. not exactly.. there is the matter of wire to keep rabbits and voles out and
Oh yes.. dirt and straw and once I’ve gathered all that,
THEN the bushes can be transplanted there and I won’t have to watch Jake and Brita crash through them where they are! What was I thinking!! !
Wednesday, July 10, 2013
Amazing growth!
 My plan is for this tomato plant to grow to the end of the long bed and not up the fence because I have another tomato plant you can see in the background that I will have grow up the fence.
Ahh… the first tomatoes…
 I LOVE The dark/black varieties!
 The little one in the front is a cherry tomato!
Tuesday, July 9, 2013
Milkweed update….

 The storm battered some down
 but for the most part, they are
all still pretty darn good!

Sunday, July 7, 2013
Do you notice it?

More blocks!

 Collecting the crescent ones for a patio by the garden shed when I get to fixing it up!


7 ways to get rid of Poison Ivy
7 ways to get rid of Poison Ivy and Poison Oak without using harsh and toxic chemical sprays. Listed in order of distance from and contact potential with plant.
1. Graze a goat there. Spanish and Angora goats are especially fond of poison ivy.
2. Vinegar spray. White vinegar will kill poison ivy, though it might take a few days to notice. Fill your garden sprayer with straight, undiluted white vinegar and take aim at the poison ivy leaves and crowns. Try not to soak the ground, since it will result in inhospitable acidity in the soil. If you want, you can use calcitic lime to neutralize any vinegar in the soil afterwards.
3. Salt, water, and natural soap spray. Mix 1 gallon of water with 3 lbs of salt until well dissolved, add 1/4 cup of natural dish soap. Spray poison ivy leaves. This solution could also kill other plants in the area, so take care not to over do it.
4. Gin Spray. Mix 1 oz gin, 1 oz apple cider vinegar, 1 tablespoon baby shampoo, 1 quart water. Spray onto leaves and crown during hot part of the day. Should be dead by the next day.
5. Burn the roots with boiling water. A good option if you just have a few stubborn plants or vines in flowerbeds or near walkways. Take your tea kettle full of boiling water and slowly drizzle on the very base of the plant. This might take a few applications over a few days, but will eventually do the trick.
6. Smother it. Using cardboard (best option) or newspaper, cover the entire area with poison ivy, then cover the cardboard with straw, wood chips, or grass clippings to keep the cardboard in place.
7. Pull it out. The fastest and most effective (and most dangerous) way to get rid of it is by pulling, or chopping it out with a maddock. Make sure if you chop it out that you get down about 8 inches and pull the vines and all out too. Fifteen percent of people are not allergic to poison ivy. So unless you are one of the lucky few, wear gloves and wash thoroughly afterward!
Saturday, July 6, 2013
A stop at Dollar Tree….
 … and loaded up with boxes. I’ve found that is the best place because they have them all folded and contained in a box. Soon the floor of part of my woods will be boxes … to cover the poison ivy that has grown like the week it is this year!
Friday, July 5, 2013
Planting carrots and lettuce
You know those carrot and lettuce seeds are so small I thought how am I ever going to plant them?? Then it came to me!! The ice cube trays with holes fit perfectly into the window box and the muffin baking pan is perfectly sized for a square foot area. No, I didn’t leave them there.. I put the seeds into the sections, laid it on the ground and pushed the seed into the hole and then pushed it farther down with the end of a spoon! Creative, huh?? We’ll see how it comes out!


A ReStore run…

 $5 chairs for the yard, a heavy board to make a low dog walk with the concrete blocks behind it and more landscaping stones. The square stones will be the insert for the large fire pit and the rounded ones will be part of a patio of sorts by the gardening shed. (at least that’s the plan!)

Wednesday, July 3, 2013
So now I’m getting desperate…
…and putting the tomatoes closer together… 2 in each of the pails in the first photo and one in each corner of the raised bed with the ….ta da …. laundry rack on it.. how creative is that! I just ran out of tomato stakes!


Take one bucket…
Drill holes in the bottom, add some rocks, put screen over top of rocks, add straw and soil, plant tomato, add more straw, put tomato cage in bucket, do 5 more times. I just didn’t expect all those seeds to germinate…


I think there is room for carrots!
I want a burn pit… no..
 I want a big fire pit… no… I simply want to burn bigger branches than my little fire pit will hold so I’m just trying to figure it out. Then I read you need fire bricks or a metal fire liner.. more to it than I thought… hhmmm…
Subscribe to:
Posts (Atom)